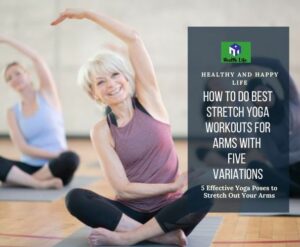
Problems are unavoidable as a consequence of the excessive amounts of sitting that are common in today’s workplaces. You have undoubtedly read that spending long periods of time sitting in front of a computer can cause back problems, neck problems, and bad posture. Here is going to examine about what are the best stretches for arm to increase flexibility.
Despite the possibility that all of these things are true, the focus of the report is on the spine. It is easy to become oblivious to the effects that prolonged sitting and working at a computer have on your arms.
But it turns out that extending your arms has additional benefits beyond only preventing and treating carpal tunnel syndrome and tendonitis. Additionally, it may help relieve discomfort in the neck and back, as well as improve posture.
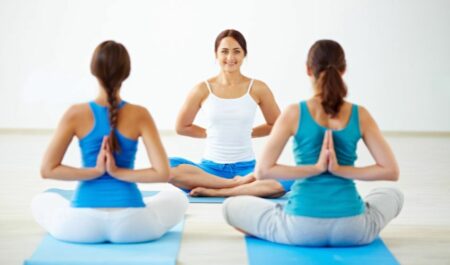
You will have a valid reason to get up and walk around a few times during the day if you perform these yoga stretches on a regular basis. Additionally, it can assist in the prevention of stiffness and the promotion of circulation.
If you’ve never done it before, the best way to ease into stretching is to follow this program a few times a week at first.
1. Eagle arms (Garudasana arms).
Shoulders and upper back get a nice stretch from this movement. In addition, it helps to flex and stabilize your shoulder joint. It contributes to an improvement in flexibility as well as range of motion. It can assist prevent slouching when working at a computer or typing on a keyboard.
Trapezius, infraspinatus, and teres minor and major were the muscles that were exercised.
Way of Doing:
- Stretch your arms out to your sides as you take a deep breath in.
- Bring them in front of you as you exhale, bringing your right arm under your left as you do so, and gripping your shoulders with the hands on the opposite side of your body. Imagine that you are giving yourself a warm embrace right now.
- You can relax your grasp and continue to wrap your forearms around each other if your shoulders have more flexibility than most people do. If you are able to contact your palms, you should press your right
- fingers into your left palm. If they are unable to, bring the palms of your hands together and squeeze together.
- While you’re inhaling, bring your elbows up a couple extra inches.
- As you exhale, roll your shoulders back and down, keeping them away from your ears.
- Take a few deep breaths and repeat the shoulder roll and elbow raise if you feel like it would help.
- As soon as you are ready, flip sides so that your left arm is the one on the bottom.
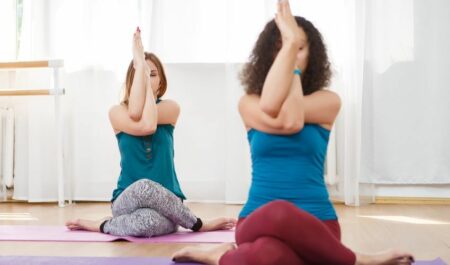
2. Reverse Prayer (Parsva Anjali Mudra)
The motion of Reverse Prayer causes an inward rotation of the upper arms. One of the reasons why that movement can be so advantageous is that it is not a movement that is often performed with the upper arms. It ensures that you move through the entirety of your possible range of motion. In addition to that, it provides an excellent stretch for your forearms.
Your entire shoulder and the muscles in your forearms are going to get a workout.
Way of Doing:
- Place your hands behind your back with your fingers pointed toward the ground and your elbows bent at a 90-degree angle. Take a big breath in. While you are exhaling, twist your hands so that the tips of your fingers point upward, and then make an effort to bring the fingertips of your opposing palms together.
- Allow yourself to sink into the stretch as you inhale, and while you do so, evaluate whether or not you should go further.
- As you exhale, continue to bring your hands closer together and see if it gives your body the deeper stretch it needs. They will travel upward along the length of your spine as a result of this.
- If your palms are able to fully press against one another, you should focus your attention on the side of your hands that contain your thumbs and maintain them softly pushing against one another.
The Modified Version Of Parsva Anjali Mudra
If what was described above feels too strenuous, you might want to try an inverted arm hold instead.
Way of Doing:
- Stretch out both arms into the shape of a “T” while maintaining your palms facing down as you inhale.
- Roll both shoulders forward as you exhale to improve your posture. This turns your palms around so that they are towards the back of your body.
- Inhale deeply. As you exhale, bend your elbows and let your hands swing behind your back. Continue until you have completed the full cycle.
- Put your fingers, hands, wrists, or elbows together to make a clasp with your hands. You should slowly move your hands apart from one another. Naturally, one hand will be on top of the other.
- After you have maintained this position for five full breaths with one hand on top, transfer to the other side and maintain this position for the same amount of time.
3. Cow Face Pose Arms (Gomukhasana Arms)
The shoulders, armpits, triceps, and chest are all stretched out as you do Cow Face Pose. People who have tight shoulders have a famously tough time with it. If this is your situation, go to the modified form shown below, which involves the use of a strap or towel.
Teres minor, triceps brachii, subscapularis, posterior deltoid, and rhomboids were the muscles that were exercised.

Way of Doing:
- As you take a deep breath in, stretch your right arm out to the side and turn it so that the palm is facing down.
- Keep rolling your palm back until your thumb is pointing behind you and your shoulder is rolled forward. Continue doing this until your palm is completely rolled back.
- Raise your left arm up toward the sky, then bend it at the elbow so that your forearm is pointing upwards toward the ceiling. At the same time, pat yourself on the back, right between your shoulder blades.
- As you exhale, flex your right elbow and bring your forearm behind your body, tucking it under your left arm. It is recommended that the back of your right hand be placed on the small of your back.
- You should gently move your two arms together, trying to get them as near as possible to being parallel to your spine. You should make an effort to maintain your hands moving together, aiming towards the cavity between your shoulder blades.
The Modified Version Of Gomukhasana Arms
Follow the guidelines below if you have shoulders that are more contracted.
Way of Doing:
- Holding one end of the strap with your left hand is the first step. Stretch out your left arm to the side with the palm facing up as you inhale. Keep your arm at shoulder height.
- Lift the opposite arm straight up to the heavens and then bend the elbow as if you were about to pat yourself on the back. Do this as you exhale. At this point, the strap should be dangling down your back. You should use your right hand to grasp hold of it.
- Wait until you are already breathing normally before giving the strap a little tug in the other direction. Take a seat and softly breathe in and out while you hold this stretch.
- As you take a breath in, let everything to rise up on its own. As you let your breath out, bring your attention to softly sliding your shoulder blades down your back and rolling your shoulders down as you exhale.
- Turn the other cheek. It is not surprising that one side would have a different sensation than the other.
4. Assisted Side Bend.
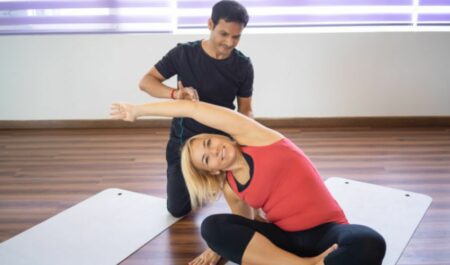
This is one of those stretches in which you might just want to give in to the sensation and keep going. This extends your arms in addition to opening up your side body and providing length across your torso. You are giving your arm a little tug, which, in addition to relieving discomfort in your shoulder joint, may also ease pressure there.
Muscles worked: latissimus dorsi, teres major, posterior deltoid, serratus anterior, obliques.
Way Of Doing:
- Maintain an upright posture.
- As you inhale, bring your palms together over your head and sweep them forth and upward. Turn your right palm up toward the heavens and bring your left hand into a clasp around your right wrist.
- As you let your breath out, sink your roots down into your pelvis (or feet, if you are standing) and bend to the left while drawing your right arm gently with your left hand.
- As you take calm, deep breaths, focus on relaxing into this moment. As you continue the stretch, focus your attention on the area around your ribcage. If they are flaring out, you should adjust them back such that your spine is expanding laterally and the stretch is still maintained in your arm and side.
- Once you are ready, switch sides and stretch the other arm out in front of you.
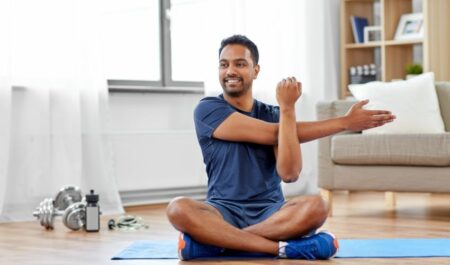
5. Stretch Your Fingers Both Up And Down.
Nothing beats a good old-fashioned fingers up and fingers down stretch when it comes to effectively stretching out your forearms, hands, and wrists. In spite of the fact that yoga does not give this practice a name, it is performed in order to preserve range of motion and loosen up everything. This indicates that it may be to your advantage to spend your entire day sitting at a computer typing.
Extensor carpi radialis longus, extensor carpi radialis brevis, extensor digitorum, brachialis, brachioradialis, and flexor carpi were the muscles that were used during this movement.

Way of Doing:
- Extend your right arm in front of you and be sure to keep it at shoulder level while you do so. Raise your index and middle fingers as high as you can, simulating the action of pressing your hand against a wall.
- You should softly pull back on the fingers with your left hand while doing the same with your right hand. Take three full breaths here, and then hold this stretch for at least a minute.
- Relax your right wrist so that your fingers are pointed in a downward direction. Now give yourself a very light tug on the back of your hand.
- Maintain a calm state in your fingers while you take at least three breaths in this position.
- Make the switch, then work on the opposite side.
The Conclusion
Even though you presumably sit and type for the most of the day, it’s possible that you still pay little attention to your hands, wrists, and arms. It’s easy to forget that these muscles and joints do a lot of work if you don’t have any active issues, like tendonitis or carpal tunnel syndrome, but they do. They are deserving of your focus and attention.
You should take breaks throughout the day to perform these stretches so that your hands don’t cramp up from typing. They may be performed in either a sitting or standing position. They are so stealthy that you could even wear them to the office.