My body feels fresh and new after I give it this kind of massage since it helps roll out tight places. When my muscles are sore and knotted up, like dried out licorice, I have dreams about a massage guru who can make them feel better. She worked her way slowly but surely into my knotted muscles, using increasing amounts of pressure as she went, until finally the kinks were worked out. So, in this article is going to examine about what is the foam rolling, benefits of it and how to foam roll correctly etc.. continue your reading.
The feeling that I had wings when she massaged my back occurred on the days that she did it. When it was leg day, I would stumble out of the apartment. Not because I was in pain, but because I felt like I had lost every gram of weight and every gram of tension.
I can no longer reach her due to the distance of a flight of twelve hours, but I have recently found an alternative to the healing witchcraft that she practices.
What Is A Foam Roller?
You may give yourself a self-administered deep tissue massage with the help of a foam roller, which is a lightweight foam cylinder. The release of muscular knots, relief of inflammation, and improvement of general comfort are all benefits of foam rolling.
In addition to this, it has the potential to improve your range of motion, flexibility, and mobility, as well as the circulation and lymphatic flow in your body.
Foam rolling is a sort of self-massage that helps you to alleviate stiffness or trigger points — a highly focused location of tense muscle, also known as a muscle knot — by making use of a piece of equipment known as a foam roller. Foam rolling isn’t just for people who are active on a regular basis.
Personal trainer Nicole Davis, who is certified by the ACE, says that it is beneficial for those who spend their entire day sitting at a desk, who have poor posture, who struggle with joint issues, and who exercise improperly.
The Benefits Of Foam Rolling
- Reduces the intensity of the pain.
- Helps to minimize the inflammation that can develop while muscles are being repaired.
- Helps mend and restore damaged muscles.
- Helps avoid injuries by preserving the length of muscle fibers and relieving stress and tightness in the muscle.
- Promotes blood flow and flexibility of muscular tissue, joints, and fascia, which helps with mobility, overall well-being, and a smoother appearance of fat underneath your skin. Fascia is the body’s connective tissue.
- Helps you relax—just let your concerns slide off your back!
How To Do Foam Roll Move Correctly?
You are in good hands with Davis. She devised a series of eight motions to target the most prevalent restricted locations.
“All that is required of you is some open floor space and a foam roller with a density ranging from low to medium. “Give yourself a goal of doing this workout three times a week,” suggests Davis.
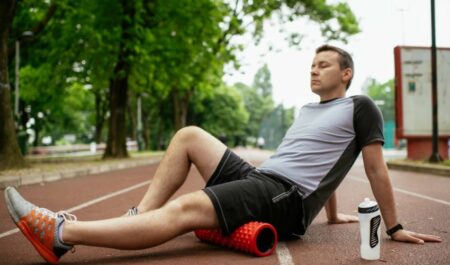
You may do this pretty much whenever you want, although Davis suggests doing it either before your workouts as a warmup or after to prevent discomfort. It’s something I like to get done before I go to bed, preferably while watching The Office.
1. Quads.
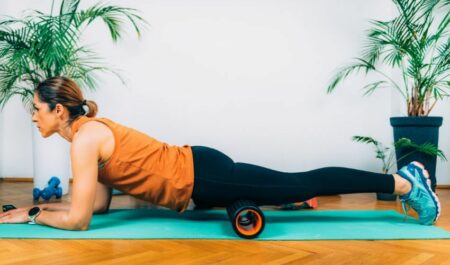
If you spend most of your day sitting at a desk because of your employment, you should roll out your quads to get your blood flowing and keep your muscles active.
Way of Doing:
- You should begin in a forearm plank position with the roller positioned underneath your quads.
- After bracing yourself with your upper body and core, start rolling down the roller at a slow pace until it reaches the area just before your knees. After that, roll in the opposite direction until you reach your hip flexors. Repeat this motion 10 times.
- Continue doing this for the next minute.
- Hold yourself there for a few breaths whenever you strike a particularly sensitive area.
If you want to be more kind to yourself, one option is to concentrate on one quad at a time before moving on to the next.
2. Hip Flexors
Hip flexors are particularly susceptible to strain when subjected to prolonged durations of sitting.
Much while stretching them is beneficial, foam rolling them is even more beneficial since it works to release the muscle tissue in addition to the connective tissue (fascia) that surrounds it.
Way of Doing:
- To begin, assume a forearm plank posture on the foam roller while lying on your back with your feet pointed away from you. You should position the foam roller so that it is underneath your left hip flexor, and you should bend your right leg to the side in a comfortable position.
- To target the hip flexor, begin by supporting yourself on your forearms and rolling slowly up and down as well as side to side on the foam roller. Pay particular attention to any trigger points that may develop.
- Continue doing this for the next minute.
- Alter positions and repeat the movement with the right hip flexor.
3. Calves.
For even more pep in your stride, try foam rolling your calf muscles in addition to performing traditional calf stretches.
Way of Doing:
- To begin, assume a seated position on the ground with your legs spread apart and the foam roller positioned directly underneath your calf muscles.
- Raise your body so that it is supported by the foam roller and your weight is distributed evenly across it. To provide additional pressure, cross your left leg over your right one.
- Start by moving your right calf back and forth on the foam roller in a slow and deliberate manner while guiding the rest of your body forward and back with your arms.
- Perform for a period of thirty seconds.
- You should switch legs and concentrate on working your left calf.
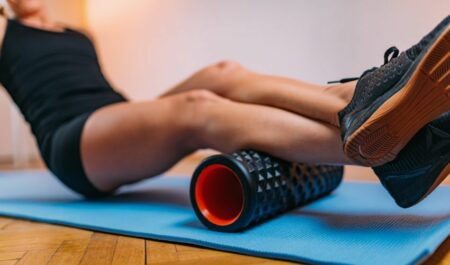
5. Hamstrings.
Your hamstrings, which are another muscle that suffers when you sit for long periods of time, may be in need of some tender loving care.
Way of Doing:
- Sitting on the floor with your legs spread apart is the starting position once more. This time, place the foam roller under your hamstrings rather than on top of them.
- Raise your body so that your weight is resting on the foam roller, and then begin to roll up and down slowly between the back of your knees and your glutes. You should feel a good stretch in this area.
- Roll for at least 30 seconds total, using more time than necessary on touchy spots.
- You can also try crossing your legs once more and concentrating on one hamstring at a time as an alternative method for finishing this.
5. The IR Band
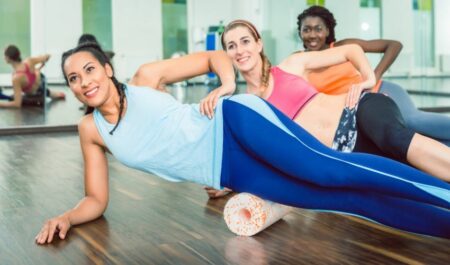
The IT band, which is composed of connective tissue, is located on the outside of the thigh and extends from the hip to the knee.
Foam rolling this area can be beneficial not just for runners, who frequently experience pain and tightness in this region, but also for anybody else.
Way of Doing:
- To begin, lie on your right side with the foam roller below your right IT band, which is located on the side of your right thigh. Put the weight of your body on your right forearm and relax. Your left knee should be bent at the knee joint, and your left foot should be placed in front of your right leg in a comfortable position. Your right leg should be straight.
- While holding yourself in place with your upper body and left leg, start softly rolling along the foam roller on your right IT band between your knee and glute, stopping at any sore points.
- Continue in this manner for the next thirty seconds, and then transition to rolling your left IT band.
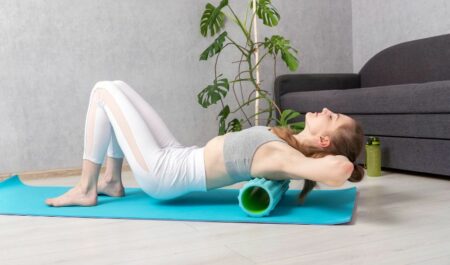
6. Upper Back.
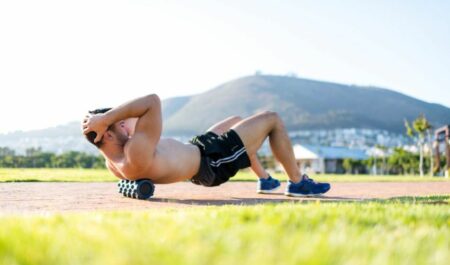
Have you let your poor posture get to you? If you feel tension in your upper back, using a foam roller will help loosen things up and get things moving more freely.
Way of Doing:
- To begin, get on your back and place the foam roller directly underneath your upper back. This will be your starting posture. Your arms should be at your sides or crossed in front of your chest, and your knees should be bent with your feet flat on the floor. Keep your back straight and your shoulders back.
- Consolidate your abdominal muscles, then pull yourself into a shallow bridge position.
- Begin by rolling up and down between your lower neck and mid-back, pausing to release tension in regions that are particularly tight along the way.
- Repeat for the next thirty seconds.
7. Lats.
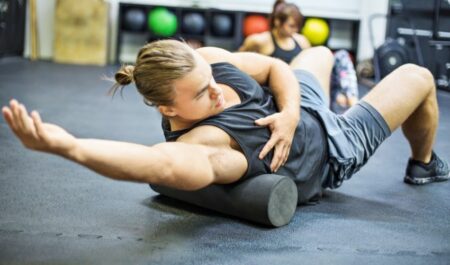
When your lat muscles, which are placed on your back just below your armpits and are affectionately referred to as your “wings,” are tight, your posture can be thrown off kilter. By giving them a few hits with the foam roller, you can ensure that they are nice and loose.
Way of Doing:
- To begin, get on your back and bend your knees to create a 45-degree angle. Place the foam roller directly under your right lat. Maintain the straight stance of your right leg while bending your left leg into a comfortable position.
- Begin to roll from your right armpit all the way down to your middle back, concentrating on any sore spots along the way.
- Repeat for the next thirty seconds.
- Make the transition to rolling out your left lat.
8. Shoulders
Do you feel like you need to work those shoulders? To restore your range of motion, roll out your deltoids.
Way of Doing:
- Place the foam roller underneath your right shoulder while you are laying on your side. Your lower body should be securely supported by the ground, and your left arm should be extended in front of you to direct movement.
- Move your shoulder blades softly back and forth across your deltoid muscle. Turn your torso ever-so-slightly to the side so that you can reach a portion of your upper back as well, if necessary.
- Repeat for the next thirty seconds.
- Alternate sides, then repeat the process on your left shoulder.
Bonus Range Of Motion: The Neck
I find that using my foam roller helps relieve the severe headaches that I get, particularly those that are caused by strain in my neck. This functions as a self-massage that is more effective than any hand could be.
Way of Doing:
- Put your head and neck on the foam roller so that it supports your neck at the point where it joins your head.
- Turn your head to the right slowly while maintaining a firm grip on the area where you feel a tightness.
- Exhale, and look to the left as you turn your head.
- Repeat for the next thirty seconds.
The Final Thought
A caveat from Davis: “Foam rolling can be uncomfortable, particularly if you are new to it.” If you experience pain in a particular location while foam rolling, this is usually an indication that the muscle or tissue in that area is tight and in need of some TLC.
“Ease into painful locations by starting in the areas directly around it, and sensitivity should lessen fairly fast,” she adds. “Start in the areas that are immediately surrounding it.” “However, if you find that you cannot handle it any longer, then stop.”
Because I spend so much time sitting at my desk, I can attest to the fact that foam rolling has been extremely beneficial to my overall health.
Because of the sessions I take once a week, I no longer suffer from the persistent tension and sharp pain that used to be present in my arm and shoulder. Yes, I also hire someone else to do it for an hour each week so that I can be certain that I am untying each and every knot.