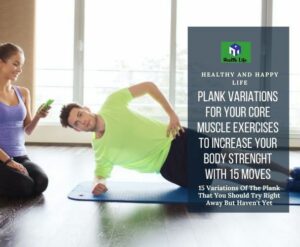
Developing a solid core frequently feels like it will be a struggle for the rest of one’s life. However, regardless of whether or not your abdominal muscles are visible, there are a variety of reasons to concentrate on building up your core strength. In this article is going to examine about what are the plank variations core exercises to build strong core muscles.
Developing a robust core, as stated by the Centers for Disease Control and Prevention (CDC), can assist in the prevention of back problems and enhance one’s level of stability.
And what is among the most effective techniques to get the work done? Planks.
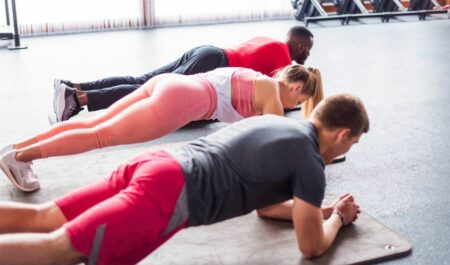
Planks, whether you like them or not, are one of the most effective ways to tone your abdominal muscles and trim your waistline. Since planks put less strain on your spine and hip flexors than crunches or situps, several fitness gurus now advocate doing planks rather than crunches or situps.
In addition to that, holding a plank position will simultaneously work to strengthen your back, glutes, hamstrings, arms, and shoulders. This is a significant advantage for only thirty to sixty seconds of your time.
There are many different ways to perform the plank, which may assist you in developing a strong core whether you have prior experience or are just starting out.
This post will teach you 15 different plank variants, starting with the easiest and working your way up to the most difficult.
1. Knee Plank (For Beginners).
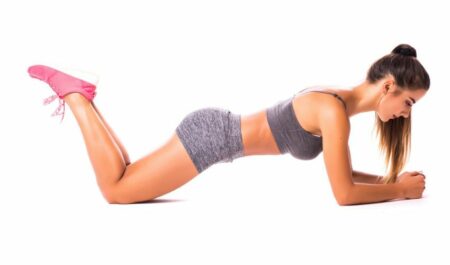
If you are new to planks or haven’t done them in a while, you might want to begin with a modified version of the forearm plank. For example, you can start with your knees bent instead of your toes.
This relieves strain on your lower back while yet providing a challenging exercise for your core muscles. You will eventually be able to advance to the standard forearm plank position.
- Place your forearms on the ground while you are lying on your stomach. Check that your elbows are positioned such that they are squarely beneath your shoulders.
- Maintain contact with the floor with your knees, toes, and elbows as you raise your torso off the ground by pressing your forearms into the ground and lifting your upper body. Maintain a strong core, keep your head in a neutral posture (don’t look up or down), and keep your hips from rising or falling by tucking your pelvis in into your spine.
- Hold this position for thirty seconds or for as long as you can while still ensuring that your form is correct, and be sure to engage your glutes.
A helpful hint: Although using a yoga mat is not needed, you may want to do so if you find that doing so makes your knees and elbows feel more at ease.
2. Knees-To-Chest Plank With Straight Arms (For Beginners).
The straight-arm knee plank is the next level of difficulty after the knee plank. Although it needs somewhat more arm and core strength, this variation of the plank is far simpler to execute than the standard plank.
- Position yourself so that you are lying on your stomach with your arms bent at your sides, your hands just under your shoulders, and your palms flat on the ground.
- You should elevate your chest and straighten your arms by pressing your hands firmly into the floor. Maintain a knee bend of around 90 degrees with both knees contacting the floor. Your goal should be to have your wrists in line with your shoulders, to have a strong core, and to have your neck in a neutral posture (avoid looking up or down).
- Maintain this position for thirty seconds, or for as long as you can while still ensuring that your form is correct.
3. Perform The Forearm Plank.
If you are ready to do a traditional plank with no adjustments, the forearm plank is a terrific technique to increase the intensity of the exercise and truly feel it.
- Lay down on the ground and position your arms so that they are immediately underneath your shoulders.
- Pressing against your forearms and knees, slowly elevate your body off the floor so that it is parallel to the floor. As you lift yourself up, make sure to contract your core and keep your neck and spine in a neutral position.
- You should make sure that your body is in a straight line by tucking your toes under and lifting your knees.
- Maintain this position for twenty to thirty seconds, and work your way up to holding it for one minute or longer. The longest forearm plank ever held was for nine and a half hours, as stated by the Guinness World Records organization.
A helpful hint to keep your neck in a neutral position is to let your sight fall toward your mat, which should be around one foot in front of you.
4. Perform A Complete Plank With Straight Arms.
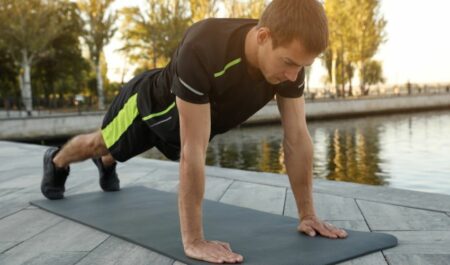
As your strength improves, you should consider increasing the difficulty of the exercise by moving into a full plank position, often known as a plank with straight arms.
- Begin by getting down on all fours and positioning your hands so that they are immediately under your shoulders. Move your knees so that they are slightly behind your hips.
- Put your hands on the floor and lift one knee at a time off the ground while pressing your palms into the floor. Bring both of your legs into a vertical position so that your head is in line with your heels. Your body should have the appearance of someone who is performing a pushup in the upward position. Check that your hands and shoulders are in the correct position, that your legs are powerful, that your feet are the appropriate distance apart, and that your core is engaged.
- Maintain this posture for at least thirty seconds, or for as long as you are able to keep your form correct.
5. Forearm To Full Plank Position.
You are already familiar with how to perform a standard plank, but alternating between a forearm plank and a full plank is an excellent way to take your exercise to the next level.
- Begin in a plank stance on your forearms.
- Lift yourself into the complete plank position by first straightening one arm at a time. To begin, practice doing this gently in order to master the transition. When you are in the high plank position, move your hands to the spot were your elbows were so that they are squarely beneath your shoulders.
- Return to the starting position of the forearm plank by slowly bending first one arm, then the other.
- Repeat this for a total of two to three sets. One set consists of thirty seconds of work. As you make progress, you should quicken the tempo to a point that is comfortable for you.
As you go from one posture to another, it is important to keep your core engaged so that your hips do not rock back and forth.
6. Forearm Side Plank On The Side.
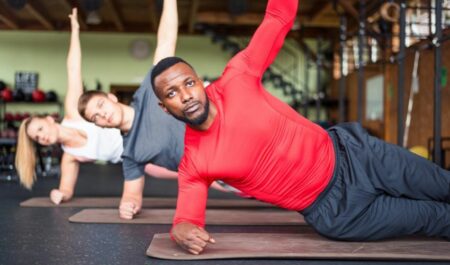
The side plank is yet another fantastic exercise that focuses mostly on targeting your obliques, which are the muscles that run down the side of your body, as well as your hip abductors.
- Lie on one side with your legs practically straight and your knees, hips, and feet stacked. Hold this position for a few minutes. Check that your elbow is positioned such that it is squarely beneath your shoulder, and make sure that your forearm is flat. Raise the opposite arm parallel to your body into the air (or keep it at your side if this is too difficult).
- Lifting your body will need you to press your hand and forearm onto the floor. Keep your abdominal muscles contracted, your hips elevated, and your legs completely straightened out. Your body should be aligned in a manner that is almost vertical.
- After you have attempted to maintain this posture for 20–30 seconds, switch sides.
A helpful hint to make the task more manageable is to maintain your knees flat on the ground as you hold the rest of your body in the air. To modify while seated on the floor with your knees, ensure that your knees are bent and that your feet are pointing backward. This will prevent undue stress on your knees.
Alternately, you may increase the challenge and generate stronger stability by varying the exercise by doing things like lifting and lowering your hips or extending your arm straight out in front of you.
7. Walking Plank.
Your core muscles, along with those of your upper and lower body, will get a workout when you walk sideways while holding a plank position. The deltoids, glutes, quadriceps, hamstrings, and even the calves are included in this category.
- You should begin in the complete plank posture, with your hands immediately below your shoulders. Engage your glutes and abdominal muscles to reduce the risk of injury and get the most out of your workout.
- Start moving laterally (to the side) by moving your right hand and foot to the right at the same time. This will get you started.
- Return to the plank posture by bringing your left hand and foot to a point where they meet in the middle.
- One set consists of completing 5 steps to the right, followed by 5 steps to the left. You should aim to finish between three and five sets, or as many as you can execute safely in one minute.
Take your time with this exercise to ensure that you are performing it correctly and to target your muscles as effectively as possible. Be sure to maintain your abdominal muscles contracted at all times.
8. Perform A Plank While Tapping Your Shoulders.
Planks that include shoulder taps train a number of different muscle groups, including the hip flexors, abdominals, back, glutes, hamstrings, and quads.
The standard plank with straight arms is made more difficult by include this technique in your routine.
- Get into the classic plank posture with your arms in a straight line. If you feel like you need additional stability, widen your leg stance.
- Lift your right hand off the ground and bring it to your left shoulder, being sure to keep your core engaged. After then, place your right hand back on the ground.
- Raise the hand on your left side to your right shoulder and contact it.
- Keep switching hands for the next twenty to thirty seconds.
During this exercise, you should try to avoid moving your shoulders or hips. The objective is to keep your body aligned in a straight line the entire time.
If you find that this is too challenging for you, you can begin the exercise on your knees by performing a straight-arm knee plank, or you can simply assume a wider stance. Bring your feet closer together to make the exercise more challenging. Because of this, it will be more difficult to preserve stability.
9. Reverse Plank.
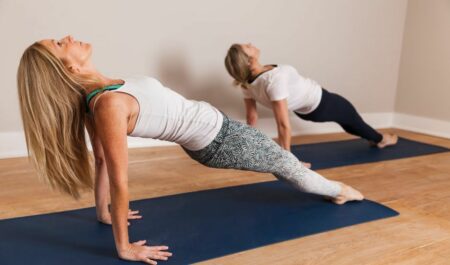
Multiple muscle groups, including your glutes, hamstrings, abs, obliques, triceps, and shoulders, are worked throughout this full-body workout. You will turn so that your stomach is towards the ceiling rather than face downward. This will be the new starting posture.
- Maintain an upright posture while seated on the floor with your legs stretched out in front of you. Put your hands flat on the floor behind you with your fingertips pointing in the direction of your feet.
- Lifting your hips can help you generate a straight line from your heels to your shoulders if you engage your glutes, abs, and arms. Make sure your shoulders are brought down and away from your ears by maintaining this position. By pulling your pelvis in slightly, you may prevent your hips from sagging.
- Hold this position for twenty to thirty seconds, or for as long as you can while still preserving correct form.
If you want an even bigger challenge, add a leg raise: While you are maintaining your reverse plank position, bend at the hip and bring your right leg up toward the sky. This will be your new starting position. When you’re lifting, it’s important to maintain your hips steady and your upper body powerful. Bring your foot back down to the floor carefully, then repeat the exercise with the opposite leg.
Put your hands on an elevated surface like a step or bench so that it is simpler for you to do what you need to do.
10. Spider-Man Plank (Knee To Elbow).
Feel the burn in your obliques, abdominal region, and lower body when you perform these “Spider-Man” planks.
- To begin, go into the full plank posture.
- To return to the plank position, first bring your right knee towards the outside of your right elbow, and then push your right leg back. Make sure that your knee is bent out to the side and that when you move your leg, your inner thigh is hovering just over the floor.
- When your knee moves forward, exhale, and when you push it back, inhale. Repeat this process.
- Begin with eight to twelve reps on each side. As your strength improves, your goal should be to perform up to 20 repetitions on each side.
Take your time and don’t rush anything. Form and movement control are the two most important aspects of this maneuver. Keep your form correct by keeping your hips up, and try not to wobble from side to side as you go.
11. Perform A Plank Position While Alternating Knees And Elbows.
Another technique that will focus on working out your obliques is this one.
- To begin, go into the full plank posture.
- Raise one of your legs and bring the opposing knee to the opposite elbow.
- You should be able to return your leg to the beginning position of the plank. Throughout the entire workout, you should be sure to have a tight hold on both your cores and your glutes.
- Continue to switch sides for the next twenty to thirty seconds, or for as long as you can keep your form correct. Aim for 2–3 sets.
A helpful piece of advice is to make every effort to maintain as much neutrality as possible in both your spine and your pelvis.
12. Perform A Plank With A Row
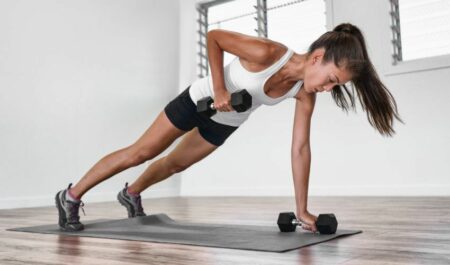
This is a wonderful workout for the whole body since it works your upper body, core, and lower body all at the same time.
- You’ll need two dumbbells, and if this is your first time working out, you should start with a less weight to verify that your form is correct.
- To begin, assume a complete plank posture while holding a dumbbell in each hand.
- Lifting the dumbbell to the side of your waist or toward your hip will count as one row, and you should do this with your right arm.
- Bring the dumbbell back to the initial position it was in.
- One row should be performed using the opposing arm.
- Perform eight to twelve repetitions on each side. Aim to accomplish 2–3 sets.
A helpful hint for doing the dumbbell row with control is to keep your abdominal muscles engaged throughout the whole exercise. If you find that you have to sway your body to raise the dumbbell, you should consider using a smaller weight. This exercise can also be performed without the use of any weights at all. If the leg on the opposite side of your body rises off the floor, try using a lighter weight while maintaining a firm gluteal contraction.
13. A Person Who Climbs Mountains.
Climbing mountains gets your whole body moving and working. They are a very efficient kind of exercise that also provide a brief period of cardiovascular activity. Make sure that throughout the whole workout you keep your wrists, arms, and shoulders in a stacked position.
- Put both hands directly beneath your shoulders as you go into the complete plank posture.
- Put your hands in a position where they are slightly wider than your shoulders, and utilize the muscles in your upper body and pelvis to balance yourself.
- While maintaining engagement in your core, raise your right foot off the floor and pull your right knee toward your chest. Do this while keeping your core engaged. Try not to rotate either your shoulders or your hips. After that, bring your right knee back to the starting position and repeat the previous steps with your left knee.
- Keep doing this action for the next twenty to thirty seconds, or for as long as you can keep your form correct.
A helpful hint: As your comfort level increases, you will be able to increase your pace. The more quickly you move, the greater the advantage to your cardiovascular system; nevertheless, it is important to ensure that you are still properly maintaining your form.
14. Plank Jack.
During your strength training, you should try doing some plank jacks to get your heart rate up.
- Begin in a high plank or a forearm plank position.
- Jump with both feet outside, further apart than the space between the hips.
- Immediately bring them back to the starting plank posture by hopping on one foot.
- Aim to finish two to three sets of thirty seconds each, or for as long as you can keep your form correct.
A useful piece of advice to keep in mind when performing the exercise is to make sure that your hips remain in a straight line at all times.
15. Jackknife With A Swiss Ball.
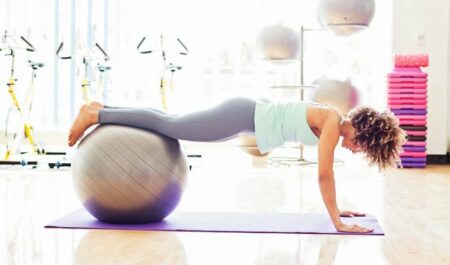
Additionally, Swiss ball jackknives are a fantastic tool for enhancing both strength and balance. On the other hand, this is an advanced technique, so you need to proceed with caution if you want to perform it.
- Put your lower legs or feet on an exercise ball and get into the complete plank posture. The practice will become more difficult as the ball gets further and further away from your head. Engage your abdominal muscles to keep your spine in proper alignment and maintain stability.
- Engage your core and push through your shoulders in order to raise your hips in a comfortable manner. While doing so, roll the ball forward with your feet while drawing your knees in toward your body. Take care not to round your back or let your hips sink when you’re sitting.
- To return to the starting plank posture, extend your legs while rolling the ball back behind your head. Throughout the whole workout, you should make sure that your shoulders remain exactly above your wrists.
- You might only be able to complete a few repetitions at a time of this exercise because of how challenging it is. As your strength improves, you should keep increasing the amount of repetitions you perform.
A helpful hint for strengthening your abdominal muscles is to move the ball further away from your center of gravity. Your goal should be to start the movement from your lower abs rather than your hip flexors.
The Conclusion
Your strength training regimen would benefit greatly from the addition of planks as an exercise.
There are many different varieties of the plank that you may do, regardless of whether you are just starting out or are an experienced exerciser.
You may continue to enhance your stability and strength by challenging yourself with these many variants, which will help you avoid injury and will contribute to an overall improvement in your health.
Helpful Hints Just For You
Because some of them are more complex, you will need to use your own discretion to determine whether or not a move is appropriate for you. Keep in mind that proper form is essential for minimizing the risk of injury and maximizing the positive effects of exercise on your body. Before beginning any new exercise regimen, you should make an appointment with your primary care physician, and if you need assistance with your form, you should work with a licensed personal trainer or strength coach.
